
If you are a fan of sublimation tumblers, you know how frustrating it can be to deal with seam lines that ruin your design.
Seam lines are the white or faded lines that appear where the paper edges meet on the tumbler. This occurs when there are air bubbles, paper misalignment, or paper looseness.
They are noticeable with dark or solid colors, and they can make your tumbler look unprofessional and low-quality.
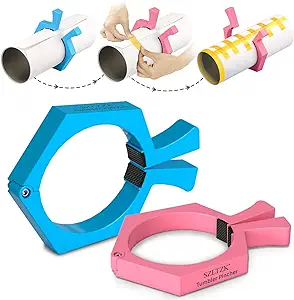
Fortunately, there is a simple and effective way to avoid seam lines and get perfect tumblers every time. All you need is a handy tool called the Pinch Perfect.
This tool acts like a third hand that helps you wrap the paper around the tumbler and keep it tight. It can also help measure the exact amount of paper you need to cover the whole tumbler.
Pinch Perfect Tool
- Tumbler, Without Seam Lines.
- Including 2 Pack Pinch.
- Cheap.
What You Need to Make Perfect Tumblers?
How to Use the Pinch Perfect Tool to Wrap a Tumbler
First, trim the excess white paper from the bottom and one of the sides of the image. You also need to trim the other side to have a small overlap of about a quarter’s width.
This will ensure that the paper covers the whole tumbler. Use a ruler and a pencil to mark the overlap and then cut it with a paper trimmer or scissors.
Clean the tumbler with some alcohol and a lint-free cloth. This will remove any dust or grease that might interfere with the sublimation process. Make sure the tumbler is dry before proceeding to the next step.
Wrap the paper around the tumbler and align the bottom of the paper with the bottom of the tumbler. You can place them both on a flat surface to make sure they are level. You also need to leave some white paper at the top of the image.
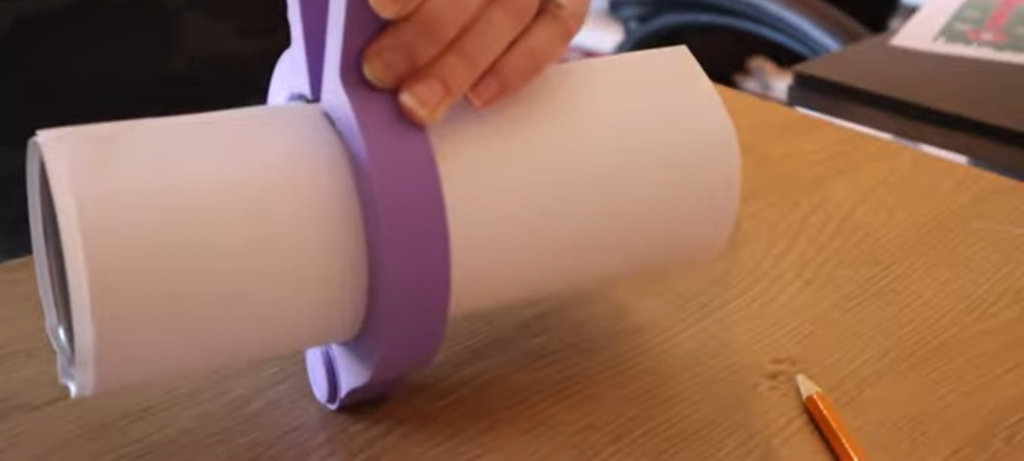
Next, use the Pinch Perfect tool to secure the paper and keep it tight. The tool has an edge that you can use to measure how much paper you need to pinch.
Place the tool on the edge of the paper and make a mark with a pencil. Then, wrap the paper around the tumbler at that point and hold it tight. The tool will pinch the paper very tightly and remove any air bubbles that might cause seam lines.
The last step is to shrink-wrap the tumbler. This will protect the paper from moving or shifting during the sublimation process. Use a heat gun or a hair dryer to shrink the wrap around the tumbler.
Now The Heating Process
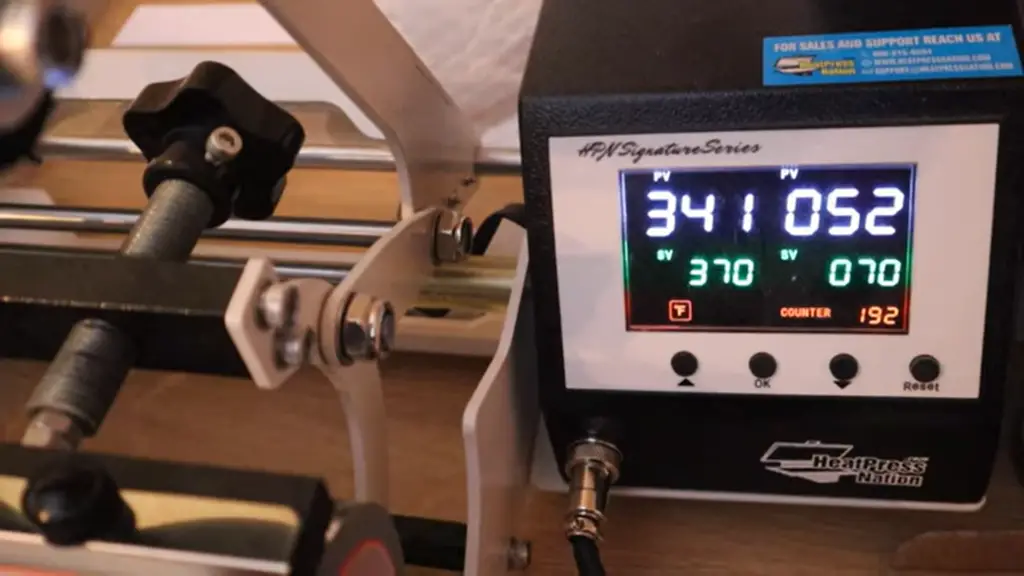
Set the temperature to 370 degrees F and the time to 70 seconds. These are the settings that I use, but you can adjust them according to your equipment and preferences.
Press the tumbler in four sections: the first half of the tumbler with the seam side of the template facing up, then the second half of the tumbler with the seam side up.
Then, rotate 180 degrees (seam side now facing down) and press the second half and first half of the tumbler again.
Carefully unwrap the tumbler and remove the paper and the shrink wrap.
Wrapping up
The Pinch Perfect tool is a game-changer for sublimation tumblers. It helps you wrap the paper around the tumbler and keep it tight.
It also helps you measure the exact amount of paper you need to cover the whole tumbler. It eliminates the hassle of having to pull the paper with an extra hand or having to deal with seam lines.